Showing posts with label raspberry pi. Show all posts

Tuesday, June 4, 2013

Project Updates

I missed posting in the month of May!

Well I have been very busy, I am involved with 2 different computer groups in town. One is a Linux user group and the other is a Computer Security group.

I've been presenting at both and have had no time to post what projects I've been doing!

So I have completely converted to Linux for my everyday computing. For the Last month I have been rocking Linux Mint 14 KDE on my 64 GB SSD and it has been great. The only issue I have had is with My Laptop's  battery life. On Windows it lasts about 2- 2:30 hours, while on linux it lasts about 1 hour and 30 minutes. That is even after turning off the DVD drive the webcam, and mic. Plus installing the packages to make linux more laptop friendly. 

Kali Linux is amazing! I have it on my Netbook, the Pi, Multi-boot jump drives, and on my Sdcard (which my laptop can boot from).

I am studying for the LPIC1 which is going well. I got the book from O'Reilly, here is a link to it LPIC-1 Study Guide

I am going to Defcon 21 and to BSides Las Vegas. I also Submitted a talk for Defcon, we will have to see if I get in.

I have also been doing a lot with the Raspberry Pi. Multi-booting, playing with new OS's, and just got my Pi Cam. This week I plan on doing a project with it. And it will be documented and posted.

I also am staring to build my own destro, based on Debian 7 stable, more of that to come in the future.

I have a Raspberry Pi war-driver project in the works, and I am making a Tv cabinet to put all my electronic gear in so my little one won't be tempted to play with it.

That reminds me of something else I did. I Fixed a 44 Inch Samsung DLP TV. It had a Bad color wheel and lamp. I spent about $240 and it is working wonderfully. It has HDMI, VGA, and DVI input, so I am super Stoked. We have been watching tv off of my older 55 inch rear projection Mitsubishi Tv, though s-video, so you can imagine the difference.

My LapDecks are amazing, I bring one with me on my Laptop bag at all times.

I'm playing with Bittorrent Sync on the Raspberry Pi, and also part of a team in Cyber Olympics, more to come on that in the future.

I have flashed Ubuntu Touch to my Nexus 7, and flashed android back.

I have flashed CM 10.1 RC2 on my S3 and Love it!

I have also been playing with the Kos cable for android and his lovely little command line app that can grab all sorts of fun files off what ever phone I plug it into.

I am still playing Ingress, Currently I am Level 7.

I live on Google plus, so if you have any questions or comments, leave them there, and I'll get back with you.


Oh yea, almost forgot.... I have Finally Bought My First Personal Domain Name..... Welcome to Securityiskey.net!!!

Friday, April 26, 2013

Raspberry Pi Lapdeck Wire Harness

In the Past post I showed you the parts you will need, So here are the Pictures of how I did it.

I got this piece...

 Then I cut off the mini male side of the cable, Leaving the female micro usb.


 Then I measured the case and 
how much cable I would need for this cable, 
and cut the excess off.
 

Soldering Time!
 Here is the Layout

Make sure to cut your heat shrink and put it BELOW where you are soldering, 
on the wire BEFORE you start soldering


So here is the pictures of me hooking it up to the lapdeck and booting a couple OS's


Here is the Final Product! 
This is my second time doing this, and in the future, 
I'll be ether making a case that snaps on 
or another type of cable management. 


Sunday, April 21, 2013

Raspberry Pi Lapdeck

Here is the list of cables and where you can buy them, to make your raspberry pi work with your lapdeck.

First You Need a Raspberry Pi here are 3 different places to get them from.


newark.com
alliedelec.com
mcmelectronics.com

Here is 2 different sites to find the atrix or bionic Lapdeck


amazon.com
ebay.com

Now here comes the fun!

You need a

1ft Micro HDMI Male to Micro HDMI Female


Micro USB B Male To Female M/F Cable

Here is a kit from Amazon that has both of the above, but the first time I bought the kit, the HDMI cable didn't work, the second time they did. So buyer beware!


Cable Adapter Set Motorola Atrix


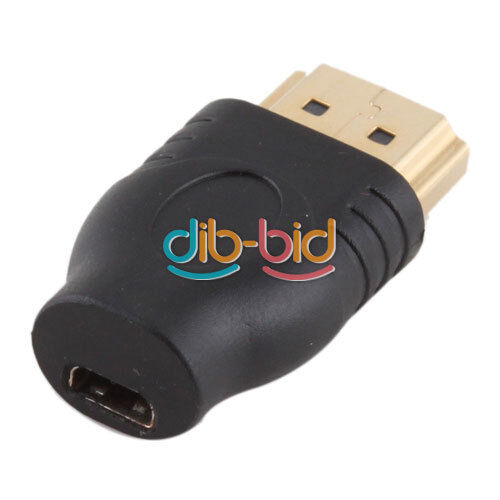
You will also need a Micro HDMI to Full HDMI

HDMI Male to Micro HDMI C Female F/M

Depending on how you wire your pi, you will need a cable like this, to cut and solder together, like the Picture at the bottom on the page.


One More Cable that you might need


Here is another Site that has different Pictures of cabling the Raspberry Pi.

I am working on a few different designs. More to come.

Monday, March 25, 2013

Raspberry Pi RDP

Raspberry Pi Remote Desktop Protocol

First to get the Windows PC ready, use the guide on this site Howtogeek.com to set RDP.

Then using the RPI-TC OS from rpitc.blogspot.com on the Raspberry Pi.

I was able to use the instructions from "The New Tech Tv" in this episode tnt008-raspberry-pi-yummy-cli

Here is the set up in a shortened form.

After installing the OS to the Raspberry Pi, find the IP address of your pi, by running "ifconfig" in a terminal.
Then go to http://www.chiark.greenend.org.uk/~sgtatham/putty/download.html, Download PuTTY on your Windows PC and install it.

Use PuTTY to connect to your pi. (If you need help because you haven't used putty and you need to see what this looks like, watching the "The New Tech Tv" episode 8 and it will show you where to put your information)

Once you have connected to your Pi, you will get a pop up window the first time you connect to it, just click ok.

If everything has gone correctly, you will then see a little windowed terminal.
We need to login with "root" and password is "raspberry"

Now we will go to the Desktop in the Terminal, use "cd /root/Desktop"

Now to see whats on the desktop use the command "ls"

There are a few different shortcuts, but the one we want to use is, RDesktop.

In your Terminal use "nano RDesktop Example!.desktop"

This will open the shortcuts parameters, some of which we will want to change.
This is roughly what it will look like


[Desktop Entry]
Name=Windows 7
Exec=rdesktop -u Vm -p -f -E -x m -z -P 192.168.123.6
Type=Application Terminal=False
Icon=/usr/share/pixmaps/RDesktop.png
Categories=Application;Network;X-Red-Hat-Base;X-SuSE-Core-Internet;

In the Name Field label as you want.
On the Exec line, you will want to put your username after the "-u" (mine is called Vm)
-p is to prompt for a password, -f for fullscreen, and after the -P put the Ip Address of the windows Pc you will be RDP'ing into.

Now if you want this to startup when the Pi starts here is what you do.

Type "cd  /root"
Then "nano win7start.sh"
Then Type

#!/bin/bash
#sleep 5
usr/bin/rdesktop -u Vm -p -f -E -x b -z -P 192.168.123.5

and click Control and O to write the file, and Control X to exit nano

Then we need to make it an exicutable script, type "chmod +x win7start.sh"
Hit enter,

In a Terminal "cd /etc/xdg/lxsession/LXDE/"
Then typel "nano autostart"

It will look like this

#@lxpanel --profile LXDE
@pcmanfm --desktop --profile LXDE
#@xscreensaver -no-splash
@leafpad /root/README


we want to change it to this


#@lxpanel --profile LXDE
@pcmanfm --desktop --profile LXDE
#@xscreensaver -no-splash
#@leafpad /root/README

@lxterminal --command "/root/win7start.sh"

and click Control and O to write the file, and Control X to exit nano.

Now it's time to reboot and see if it works!

It worked for me!

Have fun with it, and More posts to come.

As a side note, while this is very cool, it also opens your Windows Pc to more vulnerabilities, by using RDP.
In some cases, it may be wiser not to use this protocol, but that is up to you and your Admins.


Tuesday, October 30, 2012

I've been on the road...

My job requires me to travel every once in a while, this last week and a half is one of those times. I caught a flu and was out of work for a couple days, rested up, and am all set now. This last week, I can across a few great ideas that I want to implement.

First off, I am learning about Netcat this next couple weeks, and will be presenting about my findings at the next newbCON meeting.

Second, I have windows 8 waiting for me at home, as well as my lapdecks for my raspberry pi's.

Third, I found this PirateBox idea and I want to see if i can get it going on a raspberry pi.


Friday, October 5, 2012

Upcoming Project!

I had brain child yesterday while listening to "The New Tech Tv" Podcast Ep. 5

Why not get a Lapdeck for cheap, and plug a raspberry pi into it? I was working up how I could use that Matt had done and change it for the Pi. Then after thinking about it for about 2 and a half hours, which I was then off of work, decided to look up to see if the mod had been done for it yet. Sure enough, my brain child had been done already. BUT, where I see to improve on it, is get the pi to the point where it can log into a VM and run windows using the Pi-lapdeck as a terminal, with a minimalistic Linux installed.

So, since I have 2 pies, I bought 2 of the lapdecks at $50, and as soon as they get here, my the hacks begin!

More to come, and there is still a huge project I am working on, have been working on since before DEFCON 20. I have to finish getting it up and running and documentation for, then I will post it.


Saturday, September 29, 2012

Long Time No Post.

I have been pulling crazy hours at my day job and haven't posted in a while. Lots of over time which means a bigger paycheck, but that's as long as you can keep the wife happy during that time. 

So for my updates:

Bricked my Wifi Pineapple Mark 4, just got the cable this week and re-flashed from serial.
I bought this USB 2.0 to TTL UART 6PIN Module Serial Converter http://www.amazon.com/gp/product/B006JKNWLE/ref=oh_details_o00_s00_i00 

Bought the NEW alfa card AWUS036NHR in a kit I got from Amazon. 
High-Gain 2000mw 2W 802.11 B/G/N Wireless
So far I really like it and it suits my needs wonderfully.

I received my Raspberry Pi micro SD card to SD half cards from Kickstarter.
Here is the link to show what it is and how to get one. http://www.quilix.com/pio

I also grabbed a couple of NFC tags to start playing with.

I also have another idea for hiding the raspberry pi, but i want to show pictures of it once it's done.


Thursday, September 13, 2012

Project Updates

How I got started down this current "Virtual" path,
I saw the Raspberry Pi post about Magnum Pi  "Warrington Collegiate have been working on getting Windows 7 (!) running on the Raspberry Pi using the VMware View Open Client." 
And so, down the rabbit hole I went.

Citrix XenServer free looks great, but I found out it won't work with my Dell server. So what I did is pulled my hard drive out of my main desktop tower, then plugged in an extra hard drive and installed XenServer on it. Works like a charm, I like it much better then the ESXi interface. So I need to build a Virtual Server Desktop... That will be coming in the Future. So far my parts list include the parts below.

AMD FX-8150 Zambezi
3.6GHz Socket AM3+ 125W Eight-Core Desktop Processor
http://www.newegg.com/Product/Product.aspx?item=N82E16819103960

GIGABYTE GA-970A-UD3 AM3+ AMD 970 SATA 6Gb/s USB 3.0 ATX AMD Motherboard
http://www.newegg.com/Product/Product.aspx?item=N82E16813128519

G.SKILL Ripjaws X Series
16GB (2 x 8GB) 240-Pin DDR3 SDRAM DDR3 1600 (PC3 12800) Desktop Memory
http://www.newegg.com/Product/Product.aspx?item=N82E16820231489

And For the case, I'm playing with making my own or grabbing this one

COOLER MASTER Elite 311 RC-311B-OWN1 Orange Steel / Plastic ATX Mid Tower Computer Case
http://www.newegg.com/Product/Product.aspx?item=N82E16811119248

In other news:
I ordered a more ram for my laptop, 8GB, and a Lid protector. I like putting my "Hacker" stickers on my Computers, so I desided, why not make a custom one to go over my whole laptop lid that won't get scraped  off over time. So here is what I did. 


I also made one for my Nexus 7, but I'll wait a few days before I order that one.


Saturday, August 25, 2012

Hide-a-PwnPi

There are times you want to go to the library, or community college, and want to to see whats going on the network, or use their pipes. Below are a few Pictures of a quick case I made to hide such things from plan site.


Monday, August 20, 2012

Pwn Pi Pics

This is my set up

On my computer


it just says settings


like below


And it has a purple terminal background.


Using my nexus 7, ssh into it and start vnc view at 1024x600


And you can see the menu!


Wednesday, August 15, 2012

Raspberry Pi Running Apache and FTP

I started with this site, http://tinkernut.com/wiki/page/Episode_320 very easy to understand and started walking threw the steps.  About the 3rd time, locking my self out of the pi, or not being able to use the web page, I started to learn more of what I was typing. And the link above was a few months ago, I want to post How I got mine working, as of today, 8-14-2012.

I'm using Raspbin "wheezy" build  of debian, available here http://www.raspberrypi.org/downloads


After Installing the OS on an SD card, during the first set up, I select to 224Mb to ram, and enable SSH on boot.


I set the time by typing sudo dpkg-reconfigure tzdata


I check for any new updates for this Debian build, By typing sudo apt-get update 


Then install them by typing sudo apt-get upgrade


I skip the part where he upgrades the firmware, because as I read up on it, with the new build of "Wheezy" it breaks any updates and in some cases, freezes the OS so you would have to re-install it on your sd card.

Next I change the default password of the 'pi' user by issuing this command, and then type your new password twice to save sudo passwd pi

Now in the next part of his blog, he gives you a couple of options of what type of server to install. In my case, I went with Apache.

To install Apache with php, tyoe sudo apt-get install apache2 php5 libapache2-mod-php5

At this point, I haven't had any errors, so i skip the next steps telling how to fix, said problem.

Now  restart the Apache service with sudo service apache2 restart

Just type in your ip address, of your Raspberry Pi, into your web browser, and if everything went right, you should se a "IT WORKS!" page.

To install the FTP server you need haver permission to edit a file, so enter sudo chown -R pi /var/www

Now install FTP by typing sudo apt-get install vsftpd

Then you will be modifying a file in nano, to bring it up, type sudo nano /etc/vsftpd.conf

To take a direct quote from tinkernut.com "Hit ctrl+W and search for anonymous_enable=YES, and change it to anonymous_enable=NO Remove the # from in front of local_enable=YES Remove the # from in front of write_enable=YES Skip to the bottom of the file and addforce_dot_files=YES Hit ctrl+X to exit, y to save and enter to confirm"

Follow those closely and you'll be fine,

Time to restart the FTP service by typing sudo service vsftpd restart

Try logging into your pi's FTP by logging in with your username of : pi and what ever your password it.

The last thing I do is change the password for the 'root' user, type sudo passwd root  enter your password twice and your good to go!

When I tried to give permissions to root and pi in the section that follows his FTP instructions, that's when I got locked out, 3 different times and re-installs. When i skipped it, everything seams to work fine. 

Hope this helps, have a great night!

Monday, July 16, 2012

Raspberry Pi update

I bought 2 Raspberry Pi's, and I'll document here, what I did with both.


I am doing this on a Windows 8 Release Preview 32 bit, build 8400, AMD Athlon 7550 Dual-Core 2.50 GHz, 4 GB Ram.


First I went to Raspberry Pi's Official Site, under the download page and Downloaded the OS's I wanted.


Then I downloaded Win32DiskImager , then un-ziped it. 


Very Important, I right clicked Win32 Disk Imager, and ran as administrator. 


I clicked on the Blue Folder Icon, then browsed to my un-ziped OS, in this example its archlinuxarm-13-06-2010.img


I select the drive letter of the SD card in the device box. Make sure to select the correct drive; if you get the wrong one you can destroy your computer's hard disk!


I click Write and waited for the write to complete. 


After that, I exit the imager and ejected the SD card. 


Plugged the card in the Raspberry Pi, power it on, and it booted up.


The First OS I put on was Pwn Pi.
It's a security suite for the Raspberry Pi.

Default Login username is root and password root.


The picture above is what the desktop looks like.

After that I switched to my second Pi and plugged in the Debian "squeeze" OS.

And plugged it into my 55 inch projection tv via the RCA jack, and it looks great!

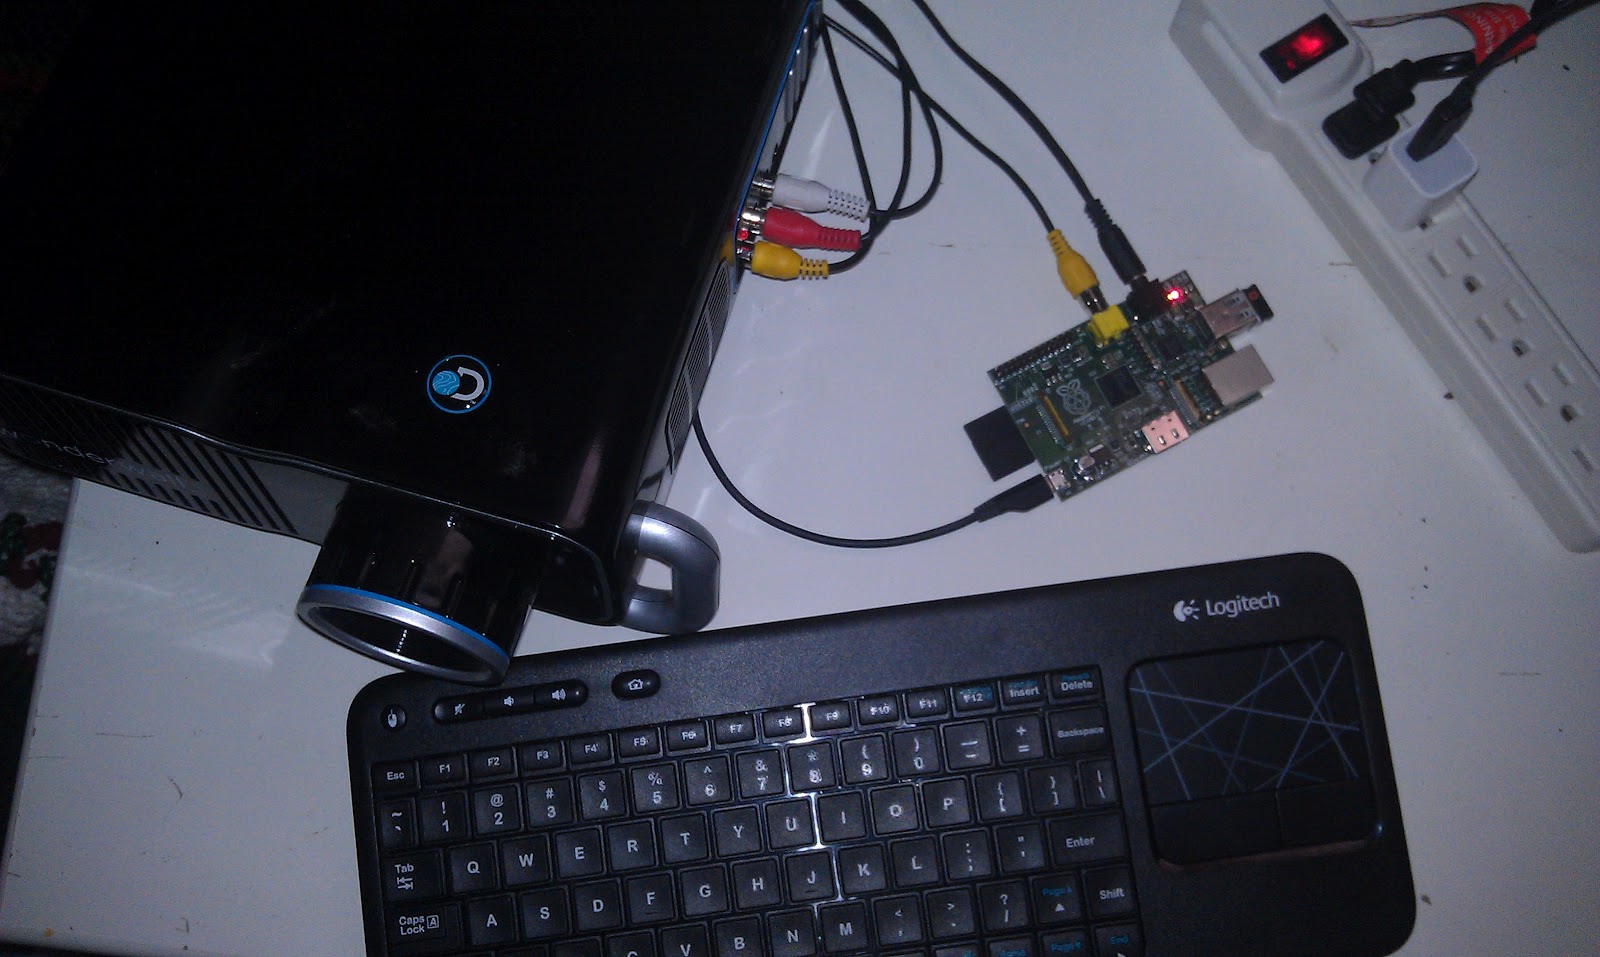
So below I wanted to test my Discovery projector with the Raspberry Pi.


Via element14.com for $35

Via woot.com when it was on sale for $35

Via local Wal-mart for $30

Via icemonkey.com when it was on sake for $4.99

That's it for tonight, have a good one, and I'll be posting more soon!